Word For Mac Layout Options
Advertisement Microsoft Word now arrives on our systems Microsoft Office 2016 is here and it's time for you to make a decision. The productivity question is -- should you upgrade? We give you the new features and the fresher reasons to help you.
To help shape the layout of your document. Microsoft has created a pretty good system: immensely open for an absolute novice, but with enough depth to be consistently used throughout the business world.
Customizing your document layout settings is easy, and we’ll show you how to do it in You don't want to upgrade to Microsoft Office 2016 or you were upgraded automatically? We show you how you can downgrade or stay with Microsoft Office 2013, whether you're a home or business user. What Can You Change? Many, many things. We’ll Default settings rarely meet the needs of every user. Here we present five easy tweaks that allow you to adapt Microsoft Office 2016 to your preferences. You see immediately when opening a new Word document, with a focus on the Home, Insert, Design, and Layout tabs as they contain the bulk of the document customization tools you’ll need.
 The Top Graphics Cards (for Now) The GPUs below span the spectrum of budget to high-end, representing a wide range of the best cards that are available now.
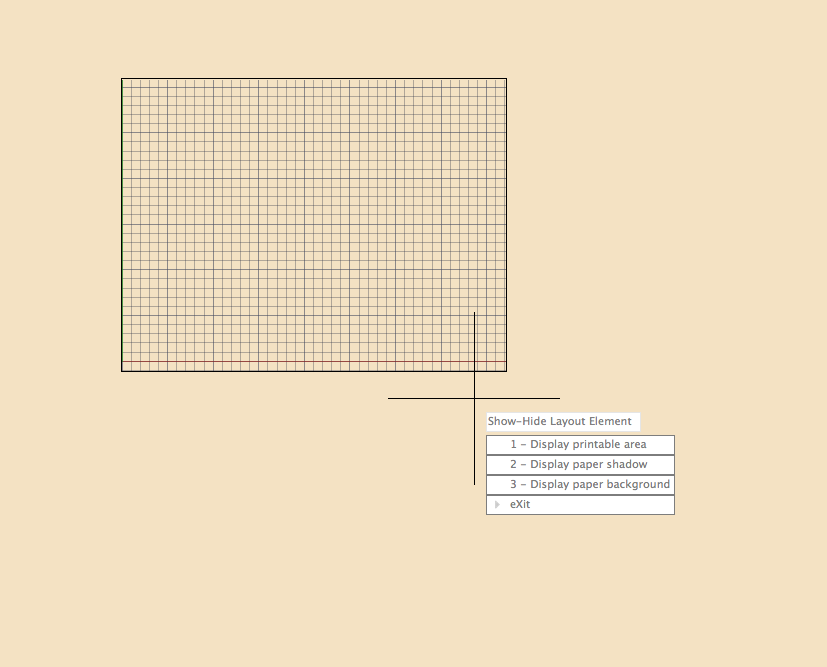
Switch to different views in Word for Mac. In Word for Mac, you can view documents in several different ways. Each view is optimized for different tasks and presents your document differently. (Print Layout, Web Layout, Outline, or Draft), or click a view icon on the view changer. The view changer is located in the lower-right corner of.
• Home: Fonts, Paragraphs, and Styles, as well as Clipboard and Editing options • Insert: Tables, Illustrations, Media, Headers & Footers, Text Boxes, and Symbols • Design: Themes, including colors and fonts, and Page Backgrounds • Layout: Page Setup, Paragraphs, and Arrange These are your manual tools. You can set up a range of formatting options before you begin editing your document to ensure the same structure and style is applied throughout, as well as using the same tools to edit your document when work is in progress.
You’re probably familiar with how to change the Font, colors, sizes, and how to apply the Bold, Italicized and underlined formats to your text. These are easily applied. Styles But it can be much faster and usually much easier to apply pre-designed Styles to your document as you move through.
The Styles are made up of individual settings, so always apply the same formatting to your document. There is a Style for “Heading 1” which will appear the same within a web-page. There is a “Title” Style which applies a 28pt font and condenses the text slightly.
There is a “Quote” Style which applies an indent to the left and right of the document, italicizes your text, and grants it a different color. For instance. This was a very quick snippet illustrating how to apply basic Styles to your document. Play around with the other styles and learn how they affect the visual presentation of your work, and what a difference that can make to your reader (and also to your own workflow!). Create Your Own Style You’re super stylish, right? Good, because I’m not. I have a big ginger beard and everything.

Enough of that. In the video I showed you how to access the additional Styles menu. It is the tiny arrow indicating there is a pop-out menu awaiting your inspection. Alternatively, hit CTRL + SHIFT + ALT + S. At the bottom of the new Styles menu are three icons: • New Style: Pretty self-explanatory. If you find yourself frequently tweaking a specific facet of your Word document layout, you should absolutely turn it into an easily applicable custom Style.