Key Commands For Screenshot On Mac
Press down on the Shift button, the Command button and “6” at the same time. Alternatively, you can also alter the settings of your Touch Bar so that the screenshot option is easily accessible through the Touch Bar itself without the hassle of key commands. Alternative Methods. May 15, 2018 - Complete keyboard shortcuts for Windows and macOS to take full. The newest MacBook Pro and want to take a screenshot of it's Touch Bar,.
Either you want to discuss something with your team, give a tutorial guide on a process, or just toss some gossip around a conversation you had with someone, screenshots are the best way to do all that. And when you quickly want to take and share screenshots, the best way to do so is through keyboard shortcuts.
Keyboard shortcuts, but only if you know which ones to use to do what. So, for all those who’re looking to take screenshot or printscreen in either macOS or Windows, here are the screenshot keyboard shortcuts that you’re looking for. Let’s dive right into it. • • • • • • Windows Keyboard Shortcut Windows natively allows you to capture the entire screen or the active screen without the help of third-party software. Here’s how you do it.
• By hitting the PrtScn button, it saves the entire screen in Clipboard, awaiting you to paste it in text editors (I.e., MS Words) or image editors for further actions. • By holding down the Alt key with the PrtScn key, this will capture only the screen of the active window. MacOS Keyboard Shortcut As compared to Windows, macOS offers more options when it comes to screen-capturing. With macOS, you can capture the entire screen, the active screen, or any pre-determined region.
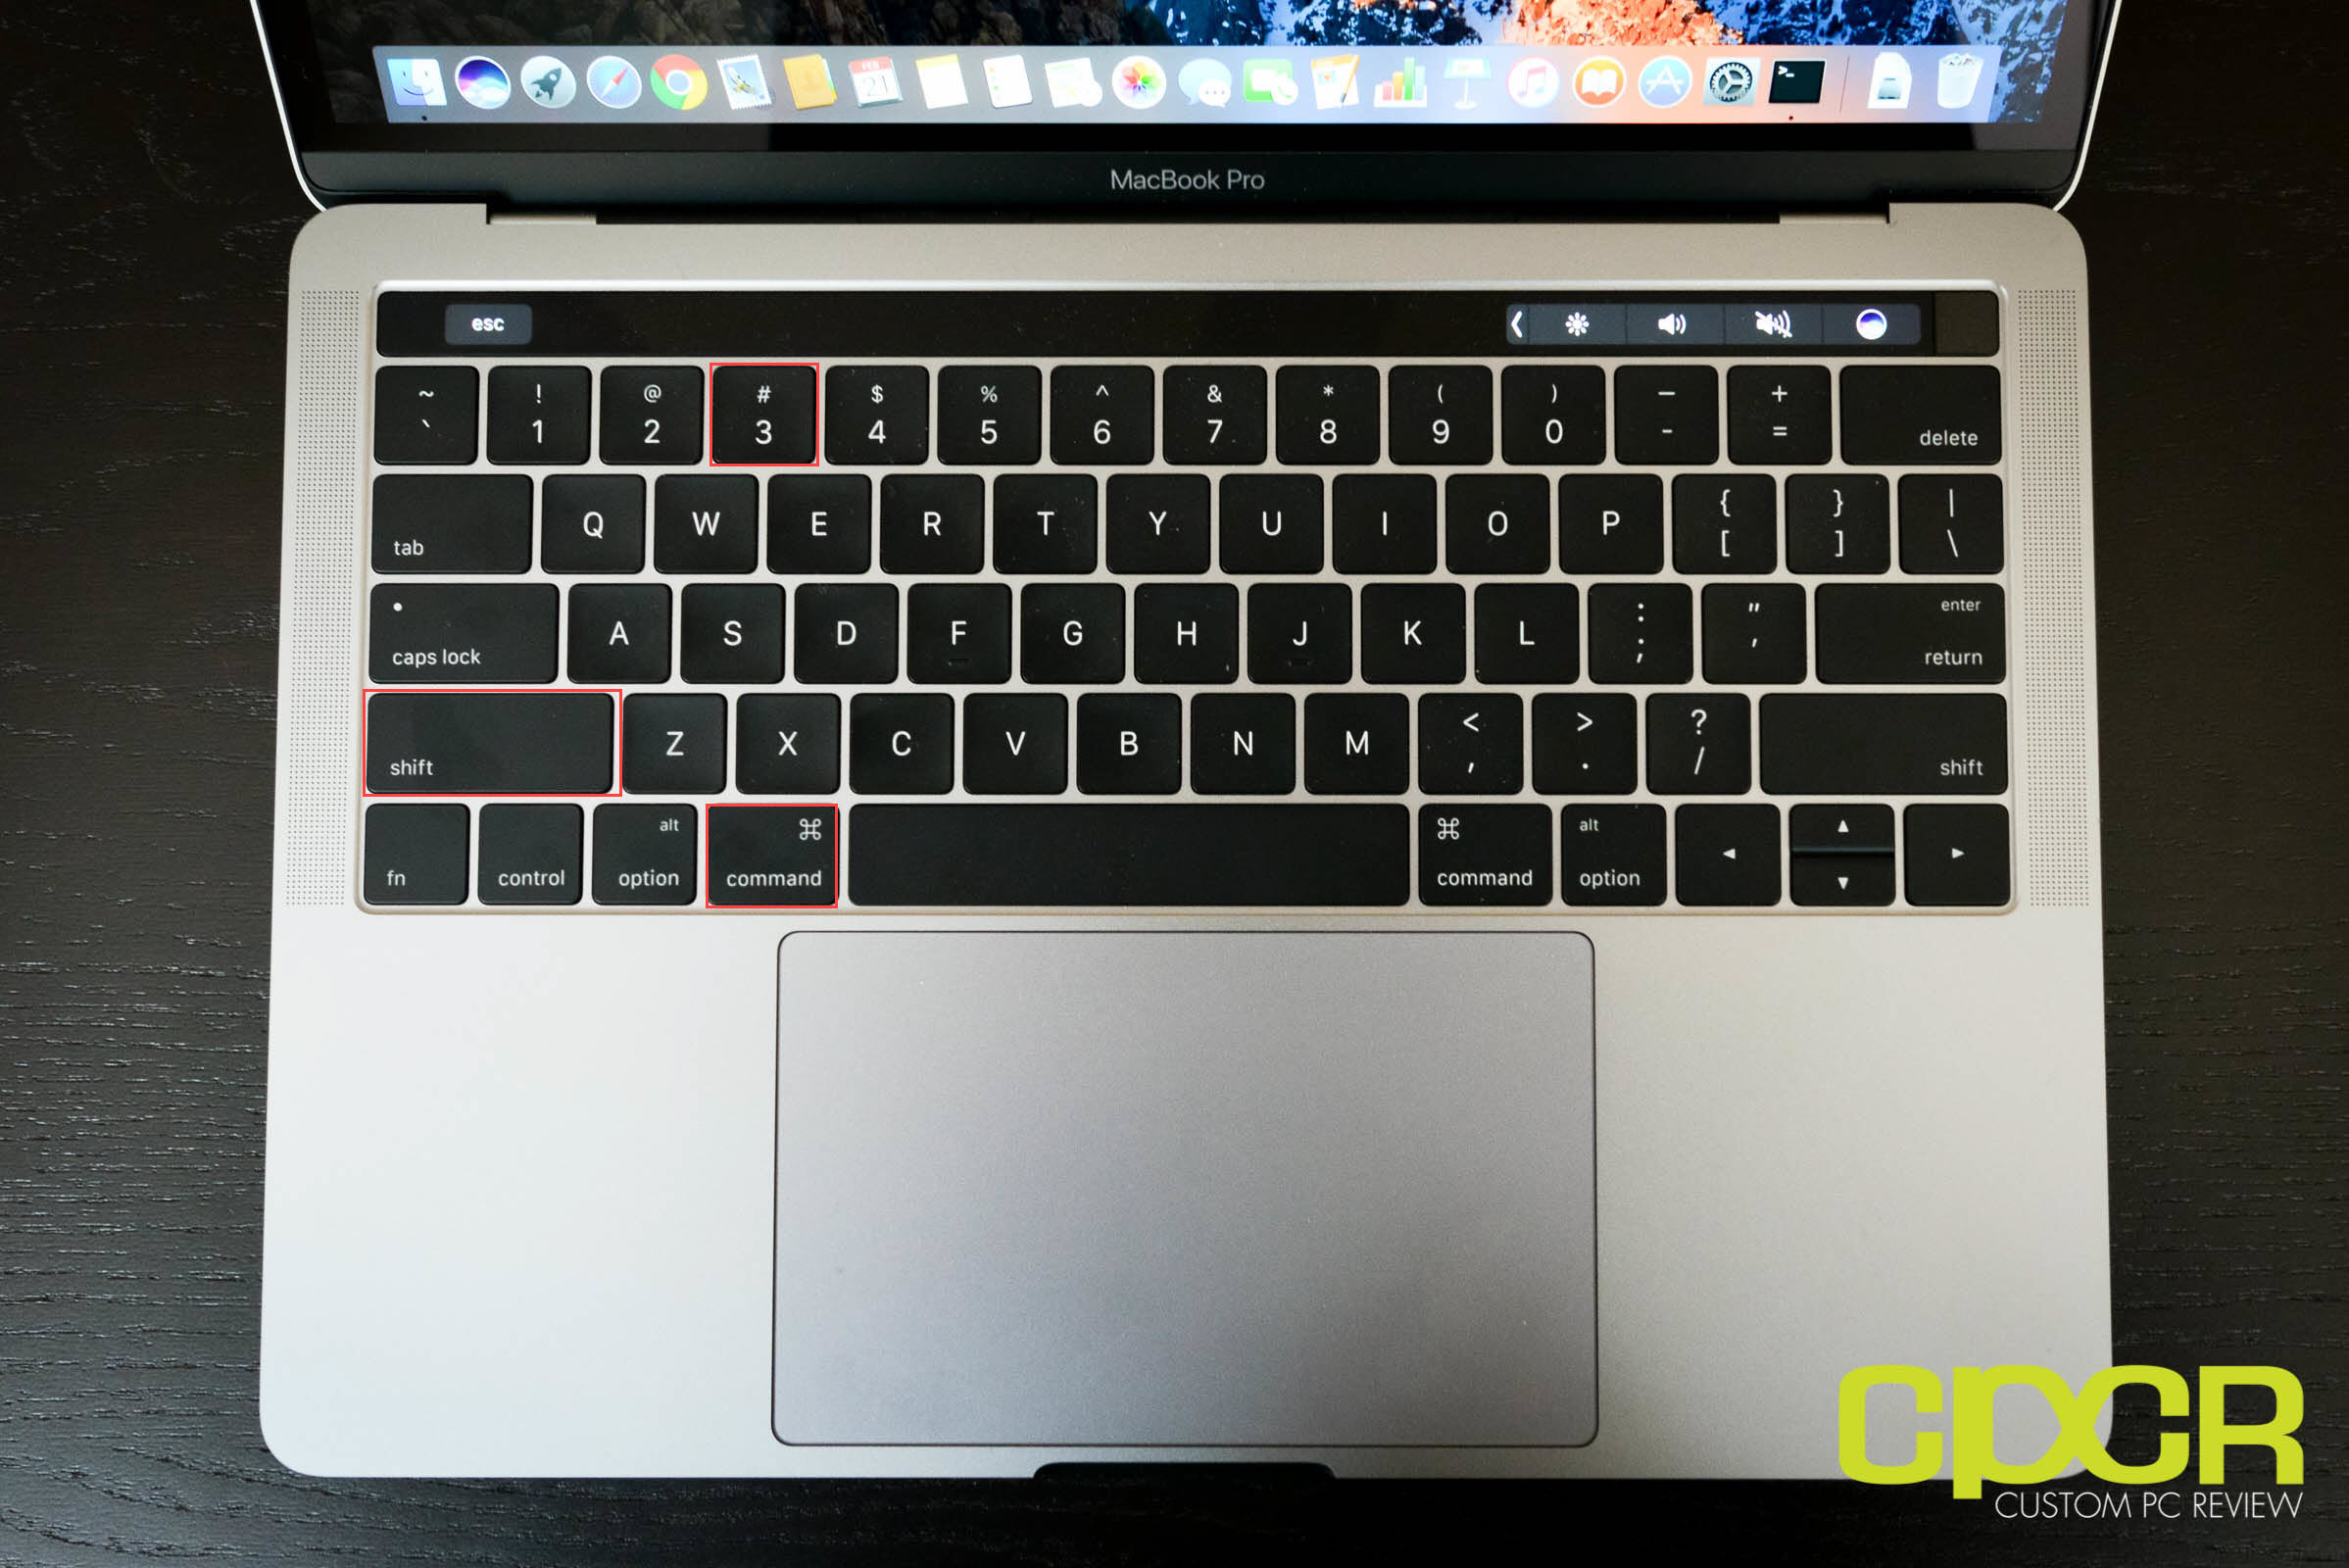
4 ways to take screenshots in macOS 1. Take screenshot of the entire screen Press Command + Shift + 3 to capture screenshot of the entire screen. The screenshot you’ll take will be saved on your desktop. Take screenshot of a specific region Press Command + Shift + 4 and your cursor will turn from arrow to crosshair. Move and drag the crosshair cursor on the region you want to take screenshot of and it will be saved on your desktop. Note: You can hold Shift or Option key while dragging to change how you make the selection. Take screenshot of a specific window Press Command + Shift + 4, then press the Space key.
This will turn your cursor from crosshair to camera icon. Now move your cursor to any window you wish to take the screenshot of and click once. The screenshot will be saved on your desktop.

Take screenshot of the Touch Bar If you own one of the newest MacBook Pro and want to take a screenshot of it’s, then press Command + Shift + 6. Note: By default, all these four methods mentioned above will save your screenshots in the.PNG format on your desktop. If you want to alter the default file format or change the default location where your secreenshot gets saved, read the next section. Ccleaner free download for macbook. Change screenshot default save location If you take s creenshots frequently or in great numbers and don’t want these images to flood your desktop, then macOS allows you to save them in a specific folder at another location. Here’s how to do it: • Create a folder, name it Screenshot or anything you like. • Open Terminal, and enter the following command, but do not press Enter yet. Defaults write com.apple.screencapture location • Now, make sure your cursor is right after the 'n' of the word 'location' and then press Space once.
• Drag the folder you created into Terminal. This will translate the folder’s path and it will be inserted after 'location'. So, your command will now look something like this: defaults write com.apple.screencapture location /Users/hongkiat/Documents/Screenshots • Press Enter and add the following command: killall SystemUIServer• Finally, press Enter again. Bonus How to hold screenshot in Clipboard If you prefer to keep your screenshots on the clipboard so you can paste them elsewhere (for instance, Photoshop), add the Control key to your keyboard shortcut.