How To Format A Toshiba Hard Drive For Mac
Make your hard disk or USB flash drive compatible to both Mac and Windows PCs using this easy step by step guide. The irony is that, by default, Windows and Mac use different file systems. While Windows uses NTFS file system, Mac hard drives are formatted with HFS file system.
Unless the hard drive is severely physically damaged, perhaps the best way to repair the drive would be to format it. Hey Damien, since your Toshiba Mac hard drive isn’t booting I recommend you to register Stellar Data Recovery for Mac with Recovery CD which will boot up your Mac and perform.
And they are incompatible with each other! Now, the question is how to make hard drive compatible with Mac and PCs? Well, you can format the drive and make it as excellent cross-platform compatible to work with both Windows and Mac.
Shortcut key for print preview in excel. This is not a difficult task at all. And if you are going to use Mac and Windows PC frequently, you will find this as very useful as any data, files, media files stored on the drive can be easily accessible from any operating system. It is just a matter of few minutes to do this.
In this article, we are going to introduce you with the entire process in few simple guidelines. How to Format a Drive for Mac and Windows PC Compatibility?  You can format any hard drive, flash drive, SSD, USB drive, that is accepted by both a Mac and Windows machine.
This article shows you how to format an external hard drive via different methods, and you can follow these methods to format external hard drive for PC, Mac or Linux. About formatting external hard drive External hard drive is popular storage device and it can be used to store all kinds of digital information such as images, documents, apps, emails, etc. You can connect external hard drive to computer via USB cable and then transfer data with internal hard drive. Regardless of the brand or model, the first thing you may need to do after purchasing an external hard drive might be partitioning and formatting it.
Formatting external disk can be done via various methods and it can be formatted to a range of file system so that you can use the disk under different operating system platforms. The formatting process removes all data on the partition and thus causes data loss. You should create a backup for important data before formatting if the disk contains significant files. Why do you want to format an external hard drive?
A brand-new external hard drive is usually partitioned into s single partition with NTFS file system. Still many users would like to format the external hard drives and people do that due to various reasons: • Format external hard drive to required file system.
The brand-new disk you purchase might not be formatted to the file system type you need. To change file system type, formatting should be done. • To quickly remove content from external hard drive. Quick formatting is able to format a partition within seconds, and all data on the volume will be deleted. This is a good solution to delete data and free up disk space.
• To optimization performance for disk. Formatting can clear data fragmentation quickly and easily.
• Remove virus or malware. Since external hard drive might be used on many computers, it tends to infect virus. Many users would format it to clear virus and avoid more damages. • To fix file system errors. Sometimes external hard drive may become RAW or reports errors like “”, you can fix these errors by formatting the volume after file recovery.
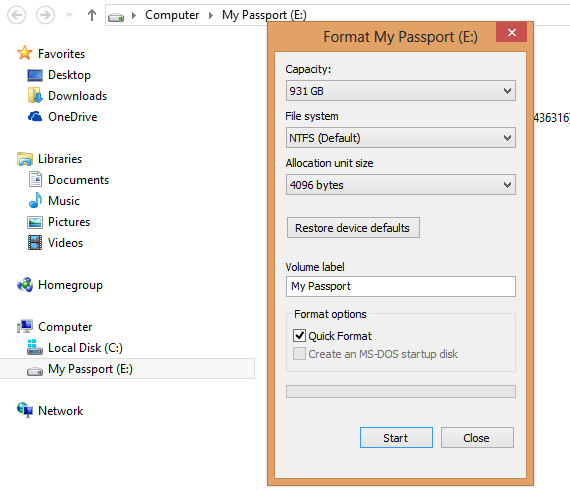
Method 1: Format external hard drive in Windows Step 1: Connect your external hard drive with your computer and open Windows Explorer to check if it can be recognized. Note: if you have stored data to the drive, please back it up before formatting the disk. Step 2: Right-click on the external hard disk and select “Format” option from context menu. Step 3: On the formatting window, select Quick Format option, choose file system format, and click Start. Also you can enter a name for the drive under Volume Label.