How Do I Fit Multiple Pages On Onto One Page For Pdf Mac
Saving an Excel spreadsheet as a PDF is a solution that I often use when I have data that I want to share with other people, but I want to avoid giving them the option to easily edit that data.  Unfortunately the PDF version of an Excel worksheet suffers from the same issues that a printed worksheet does, and you may wind up with a PDF file that contains several unnecessary pages. Therefore, you might find yourself in a situation where you need to save a spreadsheet as a one page PDF in Excel 2013. Fortunately you can achieve this requirement by adjusting a setting on the Print menu, then saving the file as a PDF.
Our guide below will walk you through the process so that you have a PDF file of your data that is easy to print and share with others. How to Fit a Spreadsheet to One Page and Save it as a PDF in Excel 2013 The steps below will show you how to adjust the settings on your spreadsheet so that the entire thing fits on one page.
We will then save the spreadsheet as a PDF so that you can easily share it with others, or print it again in that format. Step 1: Open your spreadsheet in Excel 2013. Step 2: Click the File tab at the top-left corner of the window. Step 3: Click the Print option in the column at the left side of the window.
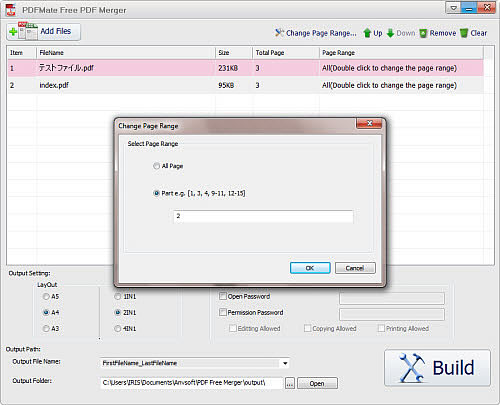
I have a PDF in which the pages are somehow double-height A4, so to print normal size I have to split each page into two. I used your suggestion and cropped each page, printed, used undo and then cropped each one again the other way and printed again. Well, if you are a Mac user then one of the best PDF merger you can get for free is. How do I scan multiple pages into a single PDF file on Mac OS X? How can I arrange the pages of a 16 page PDF document, so that 2 pages fit on one to.
Step 4: Click the No Scaling button under the Settings section. Step 5: Select the Fit Sheet on One Page option. Note that large spreadsheets can print very small with this setting. You might have better results with the Fit All Columns on One Sheet or the Fit All Rows on One Sheet option. Step 6: Click the Save As option in the left column. Step 7: Click the Save as type dropdown menu, then select the PDF option.
Step 8: Click the Save button to create the PDF file. You might find that the options you selected above don’t provide the exact results that you were looking for. In that case, to see some of the options and settings you can use to produce a file with your most optimized print options.
Question: How do I create a single PDF document from multiple scanned pages? I have a number of pages that I want to scan into a single PDF document. When I scan pages they each become a separate PDF document that I must then merge to create a single document. Is there a more efficient way to perform this operation?
Answer: PDF-XChange Editor The From Image Files option can be used for this purpose: 1. Under the Convert Tab, Click From Files > From Image Files: The Image to PDF dialog box will open. Click Import: The Scan Properties dialog box will open: • Click the Scanner Settings menu to save/select scanning profiles. • Click the Scanner menu to select a scanner to use.
• Click the Data Transfer Method menu to select either Native Mode or Memory Mode: - Native Mode uses a single memory buffer. This is the default and fastest mode, and is compatible with the broadest range of scanners. - Memory Mode enables the use of multiple memory buffers.
This is a useful function in cases where memory is low and/or when large images are being scanned. • The Show Native UI box is selected by default, which means the user interface of the device driver is used.
This is the most reliable option, and the scanner will select certain parameters of the scan itself: Color Mode, Resolution, Paper Size and Source. Clear the Show Native UI box to customize these options: - Color Mode has four options: Auto detect, Color, Grayscale and Black & White. These refer to the format of scanned documents.
- Resolution sets the dpi (dots per inch) of scanned documents. - Paper Size refers to the size of the paper used when scanning. Click Setup for further options, which are as follows: - The Automatic option determines the paper size automatically. - The Standard option contains standard sizes such as those used by the ISO and ANSI. - The Custom option can be used to enter custom dimensions. • Source has three options Auto, Flatbed and Feeder. These refer to the type of scanner being used. • Click the Sides menu to determine which sides of documents are scanned.
There are three options: Simple Scan, Manual Duplex and Manual Duplex Reversed. Click the dropdown arrow for an explanation of these options. • Click the Scan More Pages menu to select the setting for when additional pages are scanned. • Click Scan to scan the page, which will then be added to the documents listed in the I mage to PDF dialog box. • Repeat steps 2 and 3 until all desired pages have been added to the list. • Click the Options button in the Image to PDF dialog box to determine settings for the final document, as detailed • Click OK to combine the pages into a single PDF. Click Create PDF in the Categories menu, then right-click Create PDF from Images and click Run: The Choose Input Files dialog box will open. Click Add From Scanner: The Scan Properties dialog box will open.